Notebook Lesson 11
- Yonseo Rigging Kit for Modo
1) Control Hierachy
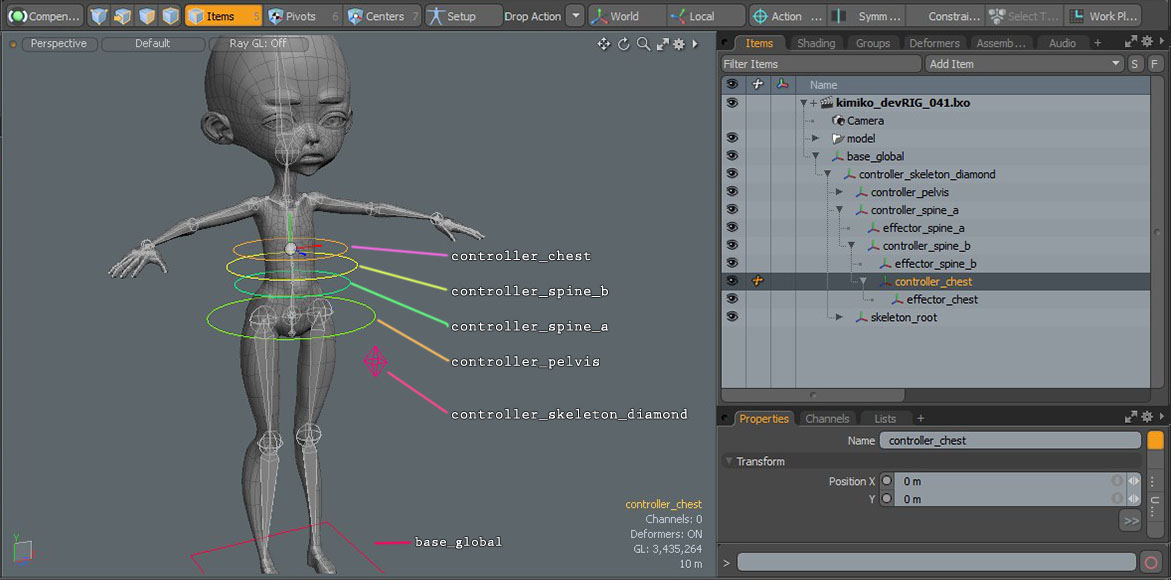
We need to look at the hierachy to understand how to organize our rig objects.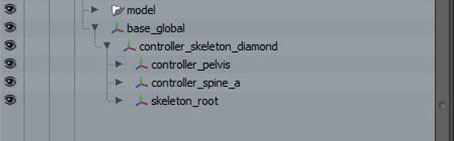 The base_global controls our entire rig. Underneath we have a child named 'controller_skeleton_diamond' that controls
the movement and rotation of our entire skeleton. The next child is 'controller_pelvis' this controls movement and rotation of our pelvis.
The base_global controls our entire rig. Underneath we have a child named 'controller_skeleton_diamond' that controls
the movement and rotation of our entire skeleton. The next child is 'controller_pelvis' this controls movement and rotation of our pelvis.
There are several childs in here that include 'controller_spine_a' and 'skeleton_root'.
'controller_spine_a' is a parent to 'controller_spine_b' and 'controller_chest'.
 Each control is a parent to an effector.
'skeleton_root' is our entire skeleton.
Each control is a parent to an effector.
2) Skeleton Hierachy
Lets take a look at the skeleton_root hierachy.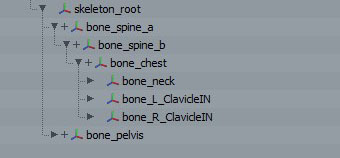
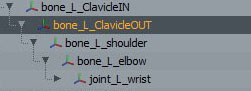
I've named my clavicle bone 'bone_L_ClavicleIN' and 'bone_L_ClavicleOUT' to organize the joints on the clavicle. The 'bone_L' lets
me know what side of the rig this bone is located.
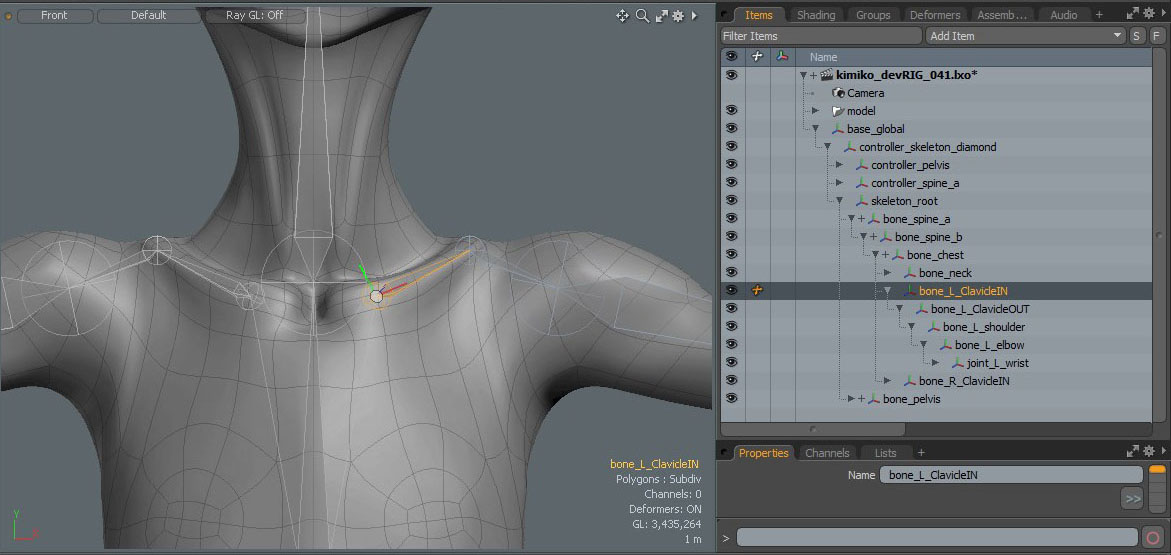
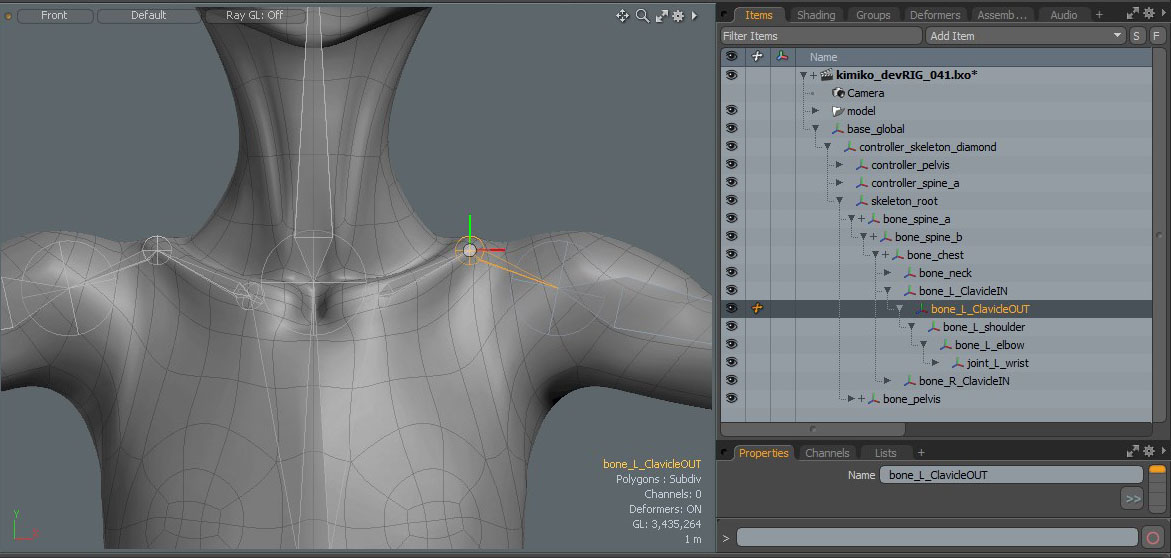 You can also use '_a' , '_b' , '_c' naming conventions instead of 'OUT' and 'IN' if you have more than one bone connection such as the hand.
You can also use '_a' , '_b' , '_c' naming conventions instead of 'OUT' and 'IN' if you have more than one bone connection such as the hand.
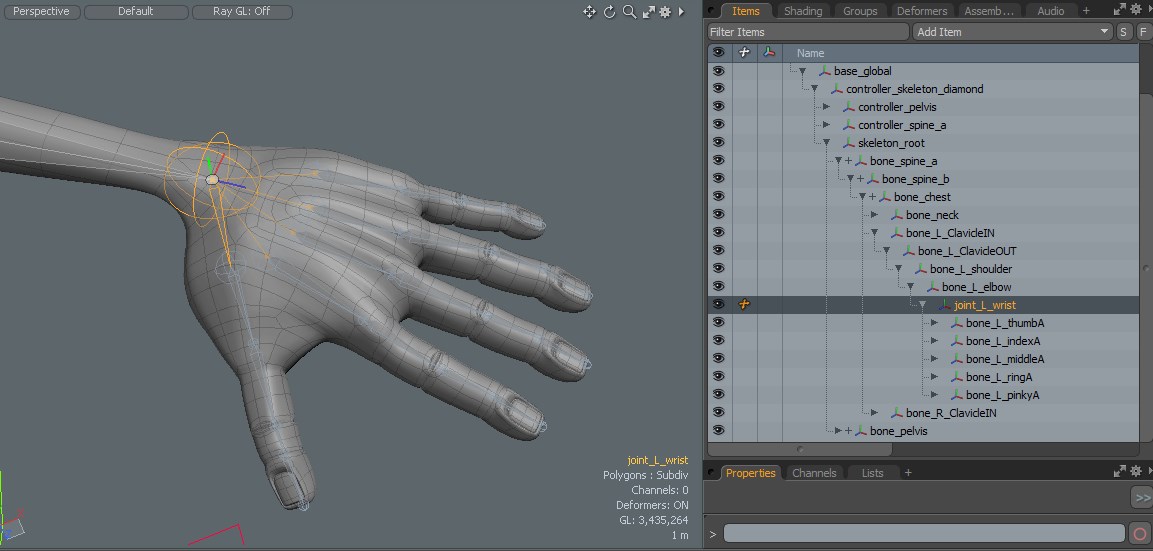
I named my wrist joint to 'joint_L_wrist' instead of 'bone_L_wrist' to let me know there is rotation and movement here.
It is ok to name it either way. Find a naming convention that is useful to you.
The Hand Hierachy
The hand contains 5 finger skeletons. Each finger contains 4 bones and 5 joints. I used the 'A','B','C' naming convention. The end joint is named 'end_' to let me know it is the end of the finger. Let's look at the index finger.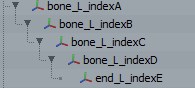 All 5 fingers are childs of 'joint_L_wrist'.
In the next lesson we will learn about the head control!